Pinhole Photography.
What Is Pinhole Photography?
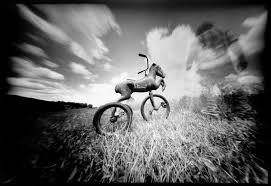
Pinhole photography is a photographic process which does not use a camera. A pinhole camera is a camera without a lens, preferably a light-proof box with a tiny hole in one side. Light from a scene passes through this single hole and projects an image on the opposite side of the box. Up to a certain point, the smaller the hole, the sharper the image , but the dimmer the projected image. Because a pinhole camera requires a lengthy exposures, its shutter may be manually operated, as with a flap made of light-proof material to cover and uncover the pinhole. Typical exposures range from 5 seconds up to several hours.
Pinhole photography is a photographic process which does not use a camera. A pinhole camera is a camera without a lens, preferably a light-proof box with a tiny hole in one side. Light from a scene passes through this single hole and projects an image on the opposite side of the box. Up to a certain point, the smaller the hole, the sharper the image , but the dimmer the projected image. Because a pinhole camera requires a lengthy exposures, its shutter may be manually operated, as with a flap made of light-proof material to cover and uncover the pinhole. Typical exposures range from 5 seconds up to several hours.
Steven Pippin
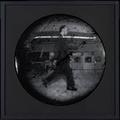
Steven Pippin’s work between 1982 and 1991 consisted of taking photos, not with conventional cameras, but with ‘pin-hole’ cameras made by converting bits of furniture and other objects, even whole rooms. Pippin's work shows a strong interest in the mechanical, which he has said comes from an early childhood memory of seeing his father surrounded by the wires and tubes of a television set he was repairing.
Steven Pippin’s work between 1982 and 1991 consisted of taking photos, not with conventional cameras, but with ‘pin-hole’ cameras made by converting bits of furniture and other objects, even whole rooms. Pippin's work shows a strong interest in the mechanical, which he has said comes from an early childhood memory of seeing his father surrounded by the wires and tubes of a television set he was repairing.

How To Make A Pinhole Camera?
What you will need:
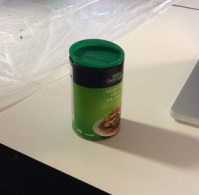
Find a irrelevant container (e.g tins, or box) It must have a lid that fits to it, and must be light proof.
Step 2:
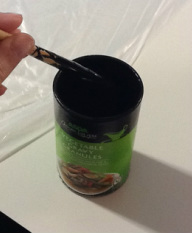
Paint or spray the inside of your container, you can paint the outside if you would like. This is to give you that dark image inside.
Also, make sure that your lid is also painted black so no light will enter through, but it must be easy to remove and replace.
Step 3:
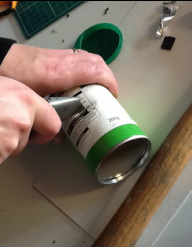
Cut a rectangular hole half way up the container. (Must be - 2cm square).
Step 4:
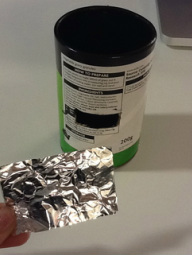
Cut 2.5cm square out of the tinfoil and smooth it out - poke a small hole into the middle of the foil with a pin, so it forms a tiny circle through.
Step 5:
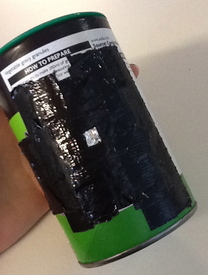
Attach the tinfoil to your container.
Make sure that the pin hole is over the rectangular hole that you have already created.
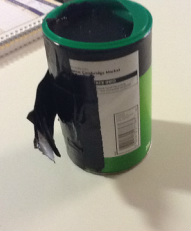
Step 6:
Make a little door shutter with foil or black tape or card to cover the pinhole so that NO light will enter.
Step 7:
In the dark room, under the red safety light. Cut a piece of photographic paper to the size which will perfectly fit into your container, Tape the photographic paper inside the container so it keeps in place (optional). Then attach your lid back on to your container, letting no light enter.
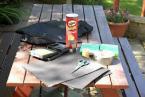
Step 8:
Take the pinhole camera, place it on a flat surface facing what you want to expose onto the photographic paper. Open your shutter for about 30 seconds to 5 minutes - depending on the brightness or the size of the pinhole. You image will be completed.
Step 9:
Close the shutter at the end of the time you've set for your exposure.
Take your camera back into the darkroom, removing your photographic paper out of your pinhole camera and place into the chemicals:
Step 10:
There are two methods of creating a positive from your paper negative:
In the dark room make sure that your print is dry, Get a flat sheet of glass bigger then the image, get another sheet if of paper round abouts the same size as your negative. Place a new (unexposed) piece of paper shiny up underneath the enlarger.. Place your negative paper on top of this and the glass in top of both.
What you will need:
- 1 container (e.g tin, gravy container)
- 1 sharp knife.
- Black dust tape.
- Small thin pin.
- Black, matt paint.
- A paint brush.
- Tinfoil
- Scissors (Optional)
Find a irrelevant container (e.g tins, or box) It must have a lid that fits to it, and must be light proof.
Step 2:
Paint or spray the inside of your container, you can paint the outside if you would like. This is to give you that dark image inside.
Also, make sure that your lid is also painted black so no light will enter through, but it must be easy to remove and replace.
Step 3:
Cut a rectangular hole half way up the container. (Must be - 2cm square).
Step 4:
Cut 2.5cm square out of the tinfoil and smooth it out - poke a small hole into the middle of the foil with a pin, so it forms a tiny circle through.
Step 5:
Attach the tinfoil to your container.
Make sure that the pin hole is over the rectangular hole that you have already created.
Step 6:
Make a little door shutter with foil or black tape or card to cover the pinhole so that NO light will enter.
Step 7:
In the dark room, under the red safety light. Cut a piece of photographic paper to the size which will perfectly fit into your container, Tape the photographic paper inside the container so it keeps in place (optional). Then attach your lid back on to your container, letting no light enter.
Step 8:
Take the pinhole camera, place it on a flat surface facing what you want to expose onto the photographic paper. Open your shutter for about 30 seconds to 5 minutes - depending on the brightness or the size of the pinhole. You image will be completed.
Step 9:
Close the shutter at the end of the time you've set for your exposure.
Take your camera back into the darkroom, removing your photographic paper out of your pinhole camera and place into the chemicals:
- Developer (1minute)
- Stop baths (a few seconds)
- Fixative (approx 5minutes)
Step 10:
There are two methods of creating a positive from your paper negative:
In the dark room make sure that your print is dry, Get a flat sheet of glass bigger then the image, get another sheet if of paper round abouts the same size as your negative. Place a new (unexposed) piece of paper shiny up underneath the enlarger.. Place your negative paper on top of this and the glass in top of both.
